


Have you heard of the Italian designer Etro? I first heard of her when I worked in a really posh department store 7 years ago and have since been following her collections on the style.com app.
I absolutely love Chinese dresses, so when I saw this beauty in her Fall 2010 collection, I always knew I would someday make my own version of it!


Several weeks ago I went fabric shopping with my mother-in-law and fell in love with this vintage looking navy blue floral fabric. I instantly knew I would pair that fabric with the above Etro design!


I am not a dressmaker. I am learning! This is only the second dress I have made so far. This post is NOT a tutorial, but rather my go-to when I choose to make another one! A lot of it may make no sense because it won't be in chronological order either. Sorry but I am a beginner and only trying to teach myself dressmaking. I am just documenting this as a reference.
MAKING THE PATTERN
Drape muslin over mannequin. Draw the desired design. Cut.
Use other patterns for help on armholes and necklines, and collars.


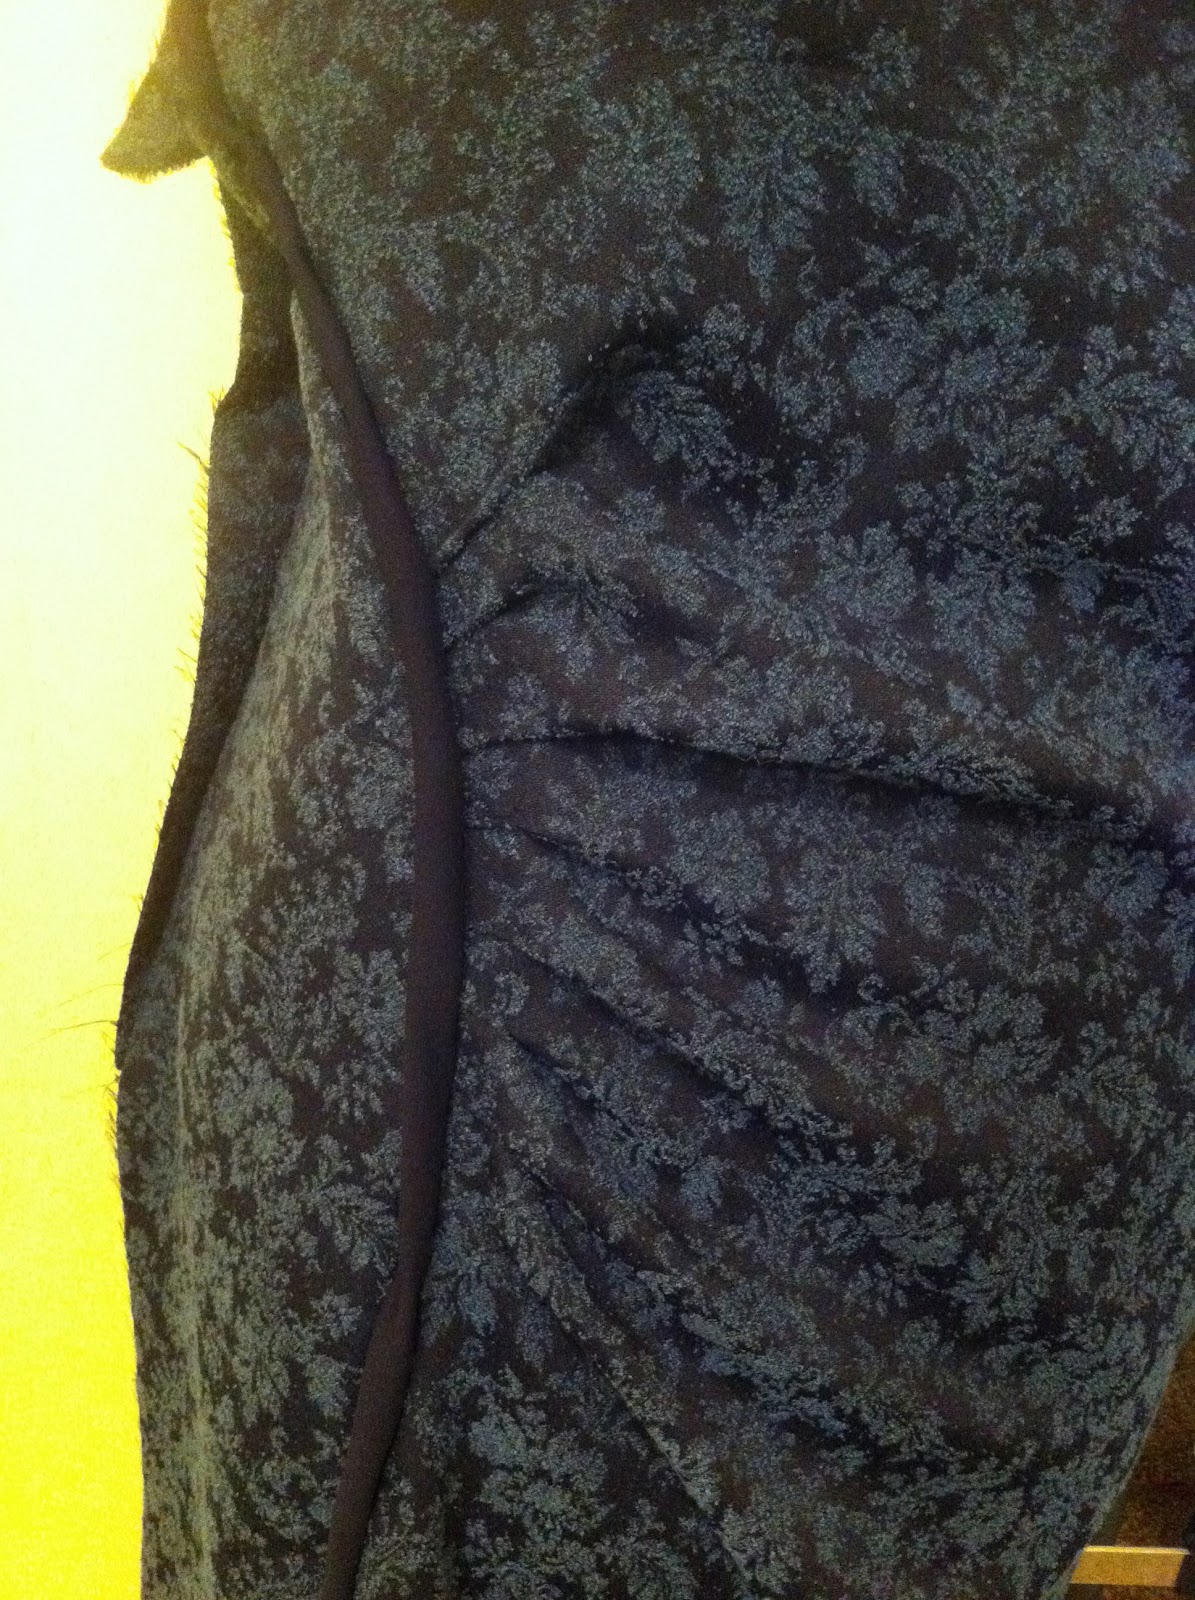
PLEATS
Decide which of these looks best for the design effect.


A. Pleats by hand
B. Shirring
C. Elastic underneath
D. Gathering option on serger
B. Shirring
C. Elastic underneath
D. Gathering option on serger
I pinned and repinned those pleats for days and days! Big ones, smaller ones, lots of pleats and less pleats, one side or both sides, it all makes a huge difference to the overall look.

Note to self: Muslin was totally different than the actual dress fabric. It looks, lays and gathers in its own way. Re-pin your pleats.
This also gives an idea of how much fabric is needed in the pattern.
Tip: mark the pleats.

And then match with pins.

COLLAR AND INTERFACING.
Do a practice run on muslin first. Watch this video for a tutorial.
Need interfacing on collar and across chest where snaps will be later hand-sewn. The interfacing needed is described on a chinese dress pattern.
Measure neck so it's not too big! Your neck may be different from the mannequin's.

SEAMS
Constantly check seams and seam allowances.
When piecing together, be sure they are laying in the same direction so it doesn't cause a bump.
Some seams need serged before sewn together.
Seams are important DETAILS for a clean finish.
CUT FABRIC.

START OVER!
 (I am so sorry this room has yellow walls. And the lighting is awful. But you get the jist yes :)
DETAILS
Sew a quick seam to hold pleats in place. Then sew about an inch into the seam to hold it down and make it more seen.


I used a bright blue thread when sewing the pleats just in case I wanted to redo them, and its a good thing because I did undo some! To cover it up, I will use a sharpie marker! Hey, it works!
Below: The pointed seam combining the blue bands. Tuck the longer one underneath, then serge the other seam with the blue band that has interfacing.
Blue band going across chest needs finished edges.

KEEP IT SIMPLE
Ruffled skirt, blue band and side skirt all layered and serged.


This also gives an idea of how much fabric is needed in the pattern.
Tip: mark the pleats.

And then match with pins.

COLLAR AND INTERFACING.
Do a practice run on muslin first. Watch this video for a tutorial.
Need interfacing on collar and across chest where snaps will be later hand-sewn. The interfacing needed is described on a chinese dress pattern.
Measure neck so it's not too big! Your neck may be different from the mannequin's.

SEAMS
Constantly check seams and seam allowances.
When piecing together, be sure they are laying in the same direction so it doesn't cause a bump.
Some seams need serged before sewn together.
Seams are important DETAILS for a clean finish.
CUT FABRIC.

START OVER!

DETAILS
Sew a quick seam to hold pleats in place. Then sew about an inch into the seam to hold it down and make it more seen.


I used a bright blue thread when sewing the pleats just in case I wanted to redo them, and its a good thing because I did undo some! To cover it up, I will use a sharpie marker! Hey, it works!
Below: The pointed seam combining the blue bands. Tuck the longer one underneath, then serge the other seam with the blue band that has interfacing.
Blue band going across chest needs finished edges.

KEEP IT SIMPLE
Ruffled skirt, blue band and side skirt all layered and serged.

MISTAKES
Are okay!
This fabric frayed really easily and it is only my second dress. There were holes that needed mending, just hand sew.

Are okay!
This fabric frayed really easily and it is only my second dress. There were holes that needed mending, just hand sew.

Remember that even the greatest of inventors made a lot of mistakes before figuring out what they needed to do to make things work. And of course practice!
DARTS
There are two small darts on the back.
This was a good link.
SNAPS
I watched this easy video tutorial on how to hand sew snaps. This dress has five across the chest on the blue band. It was super fast and easy!

BOTTOM HEM
When everything was absolutely done, lay dress across quilting measuring board, measure and cut. Finish off the hem with serger and stitch.

TAKE A BREAK.
I always feel rushed to get things done asap. I'm learning to take my time and enjoy the progress of each new step I learn.
Finished!
This took three weeks worth of nap times from start to finish. I can finally relax! Until I start my next project!

Thanks for stopping by!
xx
No comments:
Post a Comment